Angular4.x请求
码云地址:
1. 搭建工程
新建一个工程angulardemo03
ng new angulardemo03
npm install 更新依赖
2. 新建组件
在app目录新建文件夹components,自己自定义的所有的组件都放在这个目录下面.
ng g component components/news
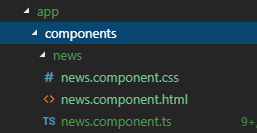
目录结构如下:
3.添加请求相关的model
编辑app.modle.ts
1 import { HttpClientModule } from '@angular/common/http'; 1 @NgModule({ 2 declarations: [ 3 AppComponent, 4 NewsComponent 5 ], 6 imports: [ 7 BrowserModule, 8 AppRoutingModule, 9 HttpClientModule10 ],11 providers: [],12 bootstrap: [AppComponent]13 }) 4.编写代码
news.component.html 编写一个按钮用来发送请求:
你好angular
news works!
从服务器拿到的值:{ {value}}
news.component.ts编写逻辑,导入http服务
1 import { Component, OnInit } from '@angular/core'; 2 3 import {HttpClient} from '@angular/common/http'; 4 @Component({ 5 selector: 'app-news', 6 templateUrl: './news.component.html', 7 styleUrls: ['./news.component.css'] 8 }) 9 export class NewsComponent implements OnInit {10 public value:any11 constructor(private http:HttpClient) { }12 13 ngOnInit() {14 // this.http.get('http://localhost:8080/user/findUser?id=1')15 // .subscribe(res=>{ this.value = res })16 17 }18 //请求数据方法19 requestData(){20 console.log('请求数据');21 var url='http://localhost:8080/user/findUser?id=1';//这里定义一个地址,要允许跨域22 this.http.get(url).subscribe(function(data){23 console.log(data);24 },function(err){25 console.log(err);26 })27 }28 29 } 5.解决跨域
由于前端工程是localhost:4200,请求后端工程Localhost:8080,会出现跨域错误:
Access-Control-Allow-Origin' header is present on the requested resource.
解决办法:
5.1 在项目的根目录添加proxy.config.json文件
1 {2 "/": {3 "target": "http://localhost:8080/"4 }5 } 5.2修改package.json文件
1 "scripts": {2 "ng": "ng",3 "start": "ng serve --proxy-config proxy.config.json",4 "build": "ng build",5 "test": "ng test",6 "lint": "ng lint",7 "e2e": "ng e2e"8 }, 5.3修改angular.json
1 "serve": { 2 "builder": "@angular-devkit/build-angular:dev-server", 3 "options": { 4 "browserTarget": "angulardemo03:build", 5 "proxyConfig":"proxy.config.json" 6 }, 7 "configurations": { 8 "production": { 9 "browserTarget": "angulardemo03:build:production"10 }11 }12 }, 5.4服务器端添加注解
1 @CrossOrigin(origins = "http://localhost:4200",allowCredentials = "true")
这样数据就拿过来了啦~

使用RxJS进行请求发送:
1 import { Observable, Subject, asapScheduler, pipe, of, from, interval, merge, fromEvent, SubscriptionLike, PartialObserver, concat } from 'rxjs';2 import { map, filter, scan } from 'rxjs/operators';3 import { webSocket } from 'rxjs/webSocket';4 import { ajax } from 'rxjs/ajax';5 import { TestScheduler } from 'rxjs/testing';
请求:
1 //另外一种请求方式 2 useRxJsRequestData(){ 3 var _result=this; 4 console.log('请求数据'); 5 if(this.inputValue==''){ 6 //用户没有输入 7 alert('请先输入值'); 8 }else{ 9 //用户有输入的值10 var url='http://localhost:8080/user/findUser?id='+this.inputValue;11 this.http.get(url).subscribe(res =>{12 console.log(res);13 console.log(typeof(res));14 console.log(res['id']);15 var _this = this;16 17 _this.obj.id=res['id'];18 _this.obj.useName=res['userName'];19 _this.obj.password=res['password'];20 _this.obj.age=res['age'];21 })22 //console.log(map);23 }24 }